
Operation Guide | Tracker Data Logger Mount Installation and Cable Connections
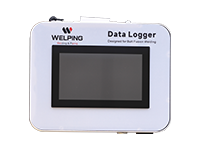
The Tracker data logger mounts onto the hydraulic unit using a swivel mount, allowing the screen position and viewing angle to be adjusted easily. The video below demonstrates the complete installation process, including mount assembly, data logger attachment, and cable connections.
1. Before Installation
Prepare the following equipment, accessories, and tools:
· Hydraulic unit and Tracker data logger
· Three mount components: mounting base, support post, and upper swivel arm assembly
· Supplied mounting screws
· Power cable and signal cable
· Allen keys and a screwdriver
Ensure the equipment is disconnected from the power supply before installation and cable connection.
2. Assemble the Mount
Secure the Mounting Base
Position the mounting base at the right-hand corner of the hydraulic unit and align the four mounting holes. Insert all four screws, then tighten them with an Allen key to secure the base.
Install the Support Post
Place the support post onto the mounting base, aligning the three holes in the bottom flange with those in the base. Insert and tighten the three screws with an Allen key.
Fit the Upper Swivel Arm Assembly
Fit the upper swivel arm assembly onto the top of the support post. Tighten the two set screws on the connecting sleeve with an Allen key.
Check that the arm swivels smoothly left and right and that the sleeve is securely attached to the post.
3. Attach the Data Logger
Adjust the mounting plate to a horizontal position. Support the data logger with its back facing up, then align its mounting holes with the corresponding holes in the plate.
Insert the supplied screws one by one, then tighten each screw with a screwdriver. Keep supporting the data logger until it is securely attached.
Once secured, adjust the screen to a comfortable viewing and operating angle.
4. Connect the Power and Signal Cables
Connect the power cable and signal cable to their corresponding ports on the data logger. Connect the other end of the signal cable to the corresponding port on the rear of the hydraulic unit.
Check that the connections are secure. Leave enough cable slack for the mount to swivel without pulling, pinching, or tangling the cables.
5. Check and Complete the Installation
Before connecting the power supply, confirm that:
· All mounting screws are tightened.
· The mount swivels smoothly, with no loose fixed connections.
· The power and signal cables are correctly and securely connected.
· The cables have enough slack when the screen position is adjusted.
After checking, connect the power supply and switch on the data logger to confirm that it starts normally.
Installation is now complete. Adjust the swivel mount to suit your working position for convenient viewing and operation. For assistance with installation or cable connections, please contact us.